How to Create an Account
Xenona uses a fully Web3-native authentication flow — your wallet is your account. There are no emails, passwords, or centralized profiles. Instead, ownership of your crypto wallet defines your identity across the platform.
Here’s how to get started, and why each step matters.
1. Connect Your Wallet
Click the “Connect Wallet” button in the top-right corner and choose your preferred option: MetaMask, Trust Wallet, Binance Wallet, or Coinbase Wallet.
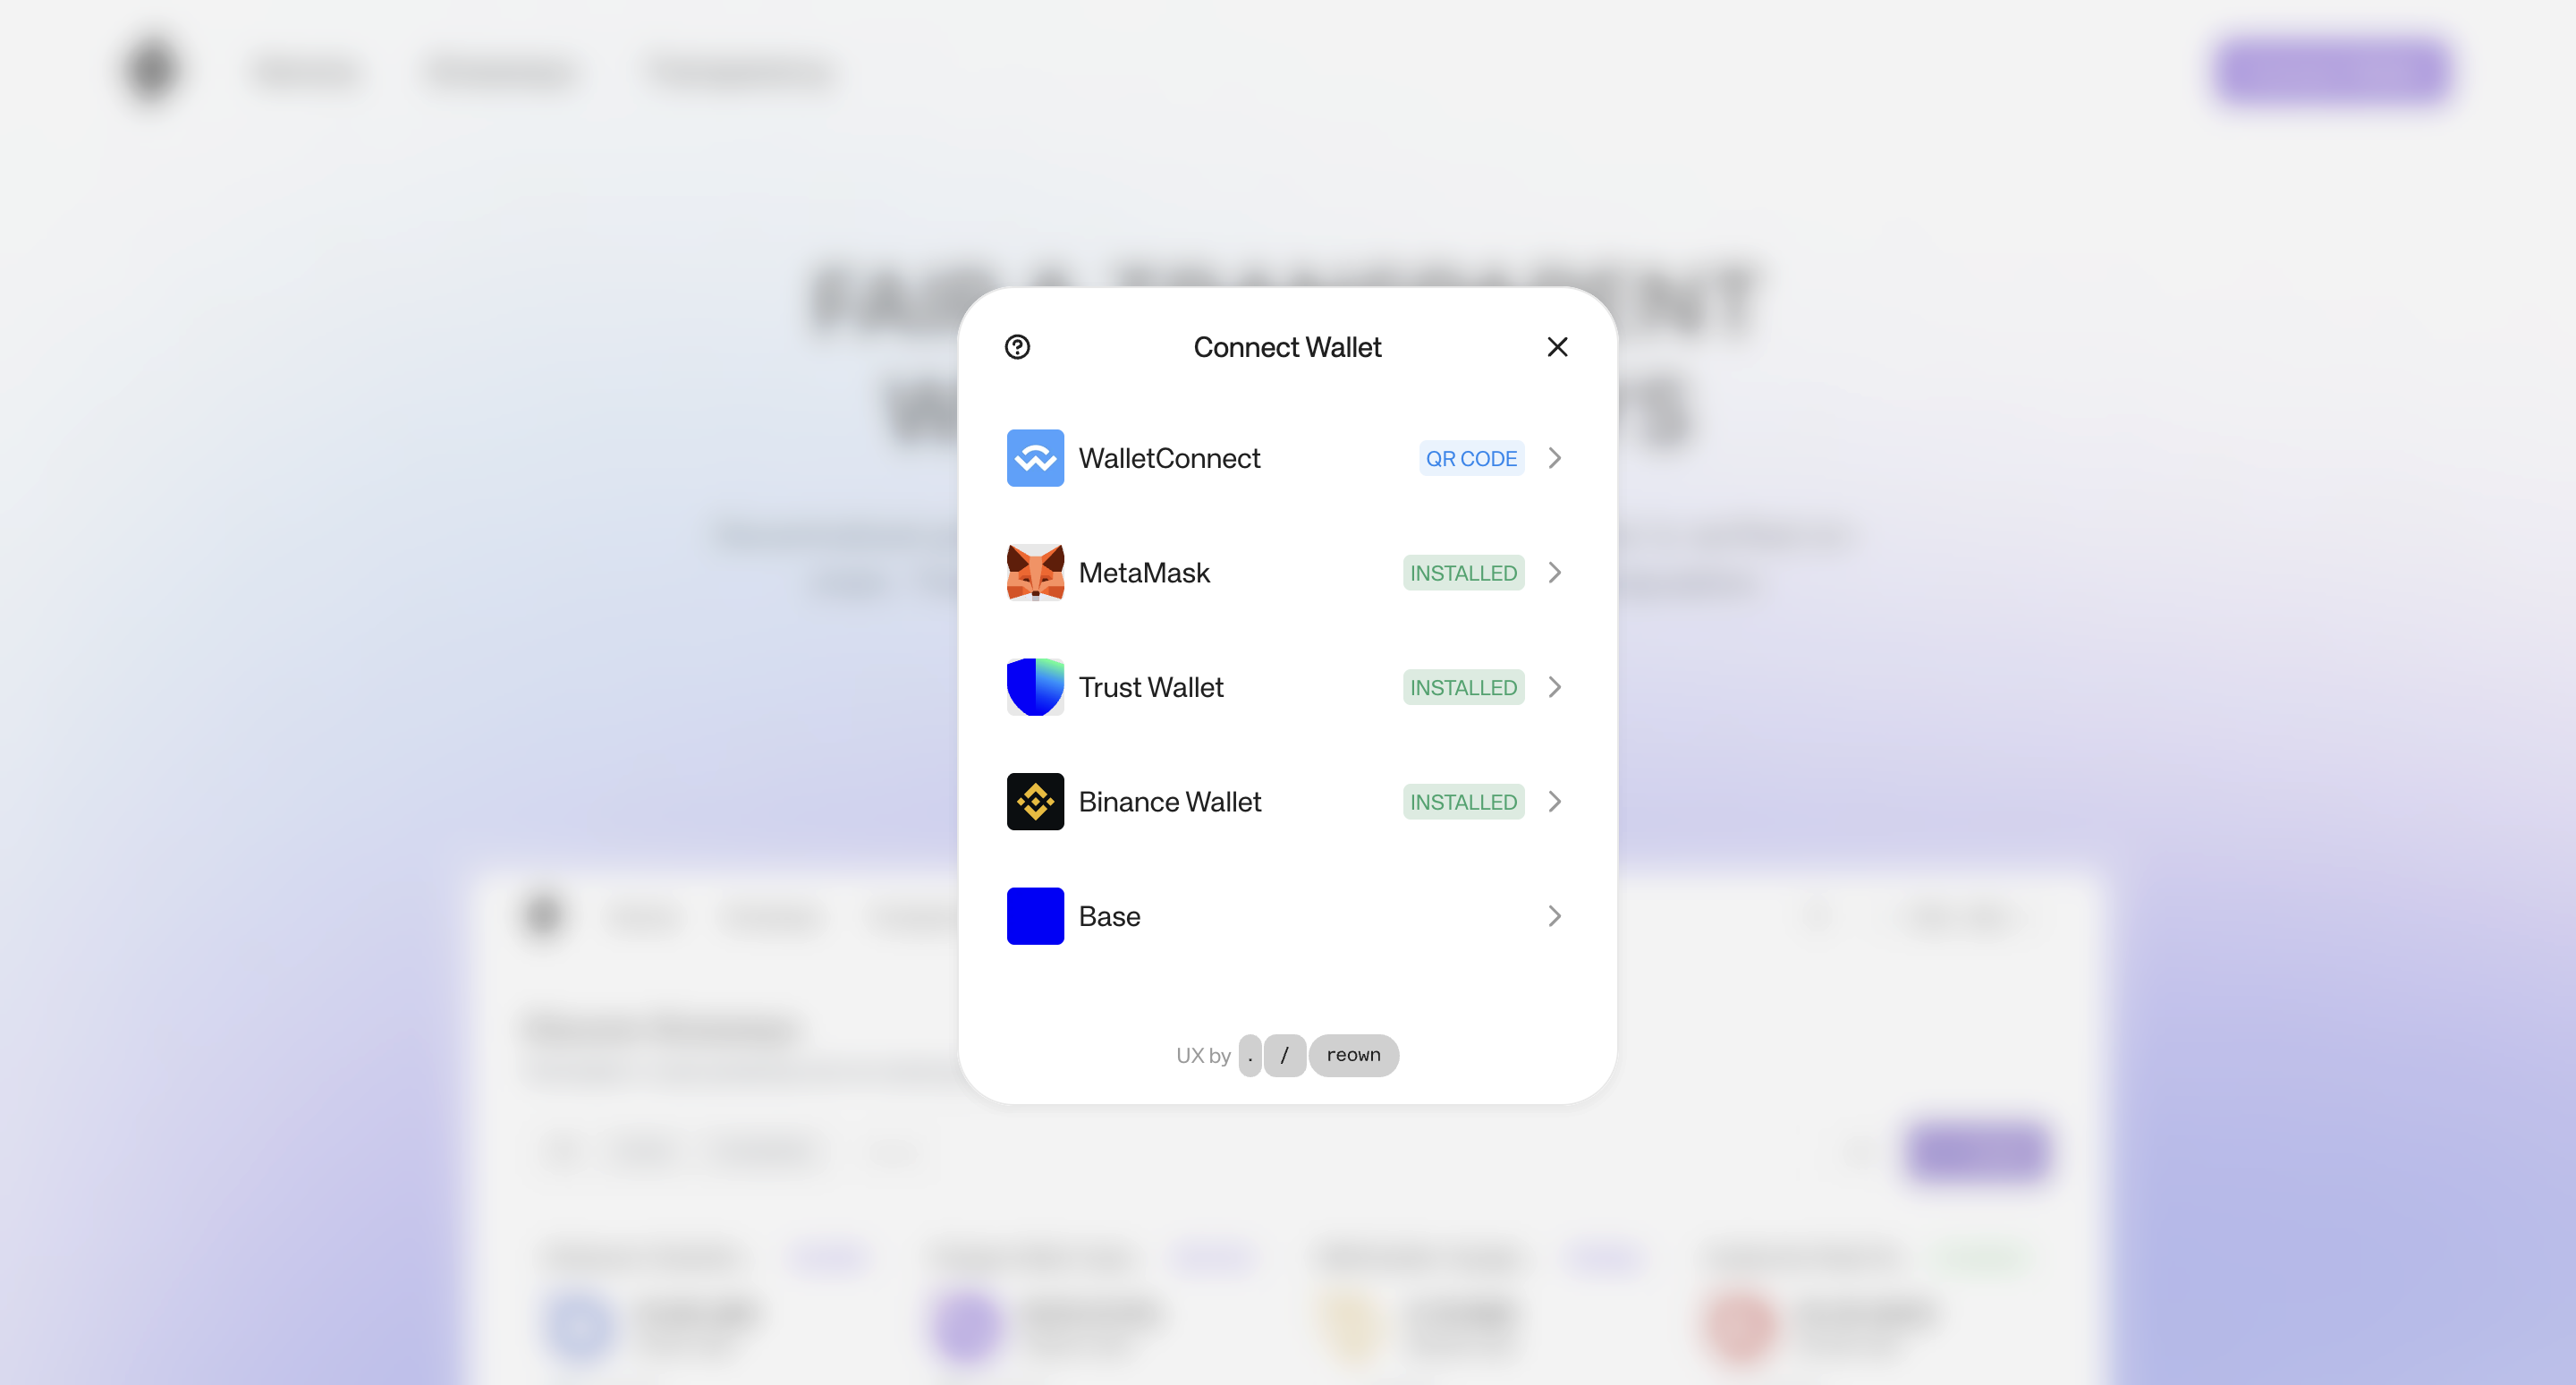
Connecting your wallet simply allows Xenona to read your public address. This step does not give the platform access to your funds or private keys — it’s the standard way Web3 apps recognize who you are.
2. Approve the Connection
Your wallet will ask whether you want to connect it to the Xenona website. Approving this is safe and necessary so the platform can show you your address, available actions, and personalized data.
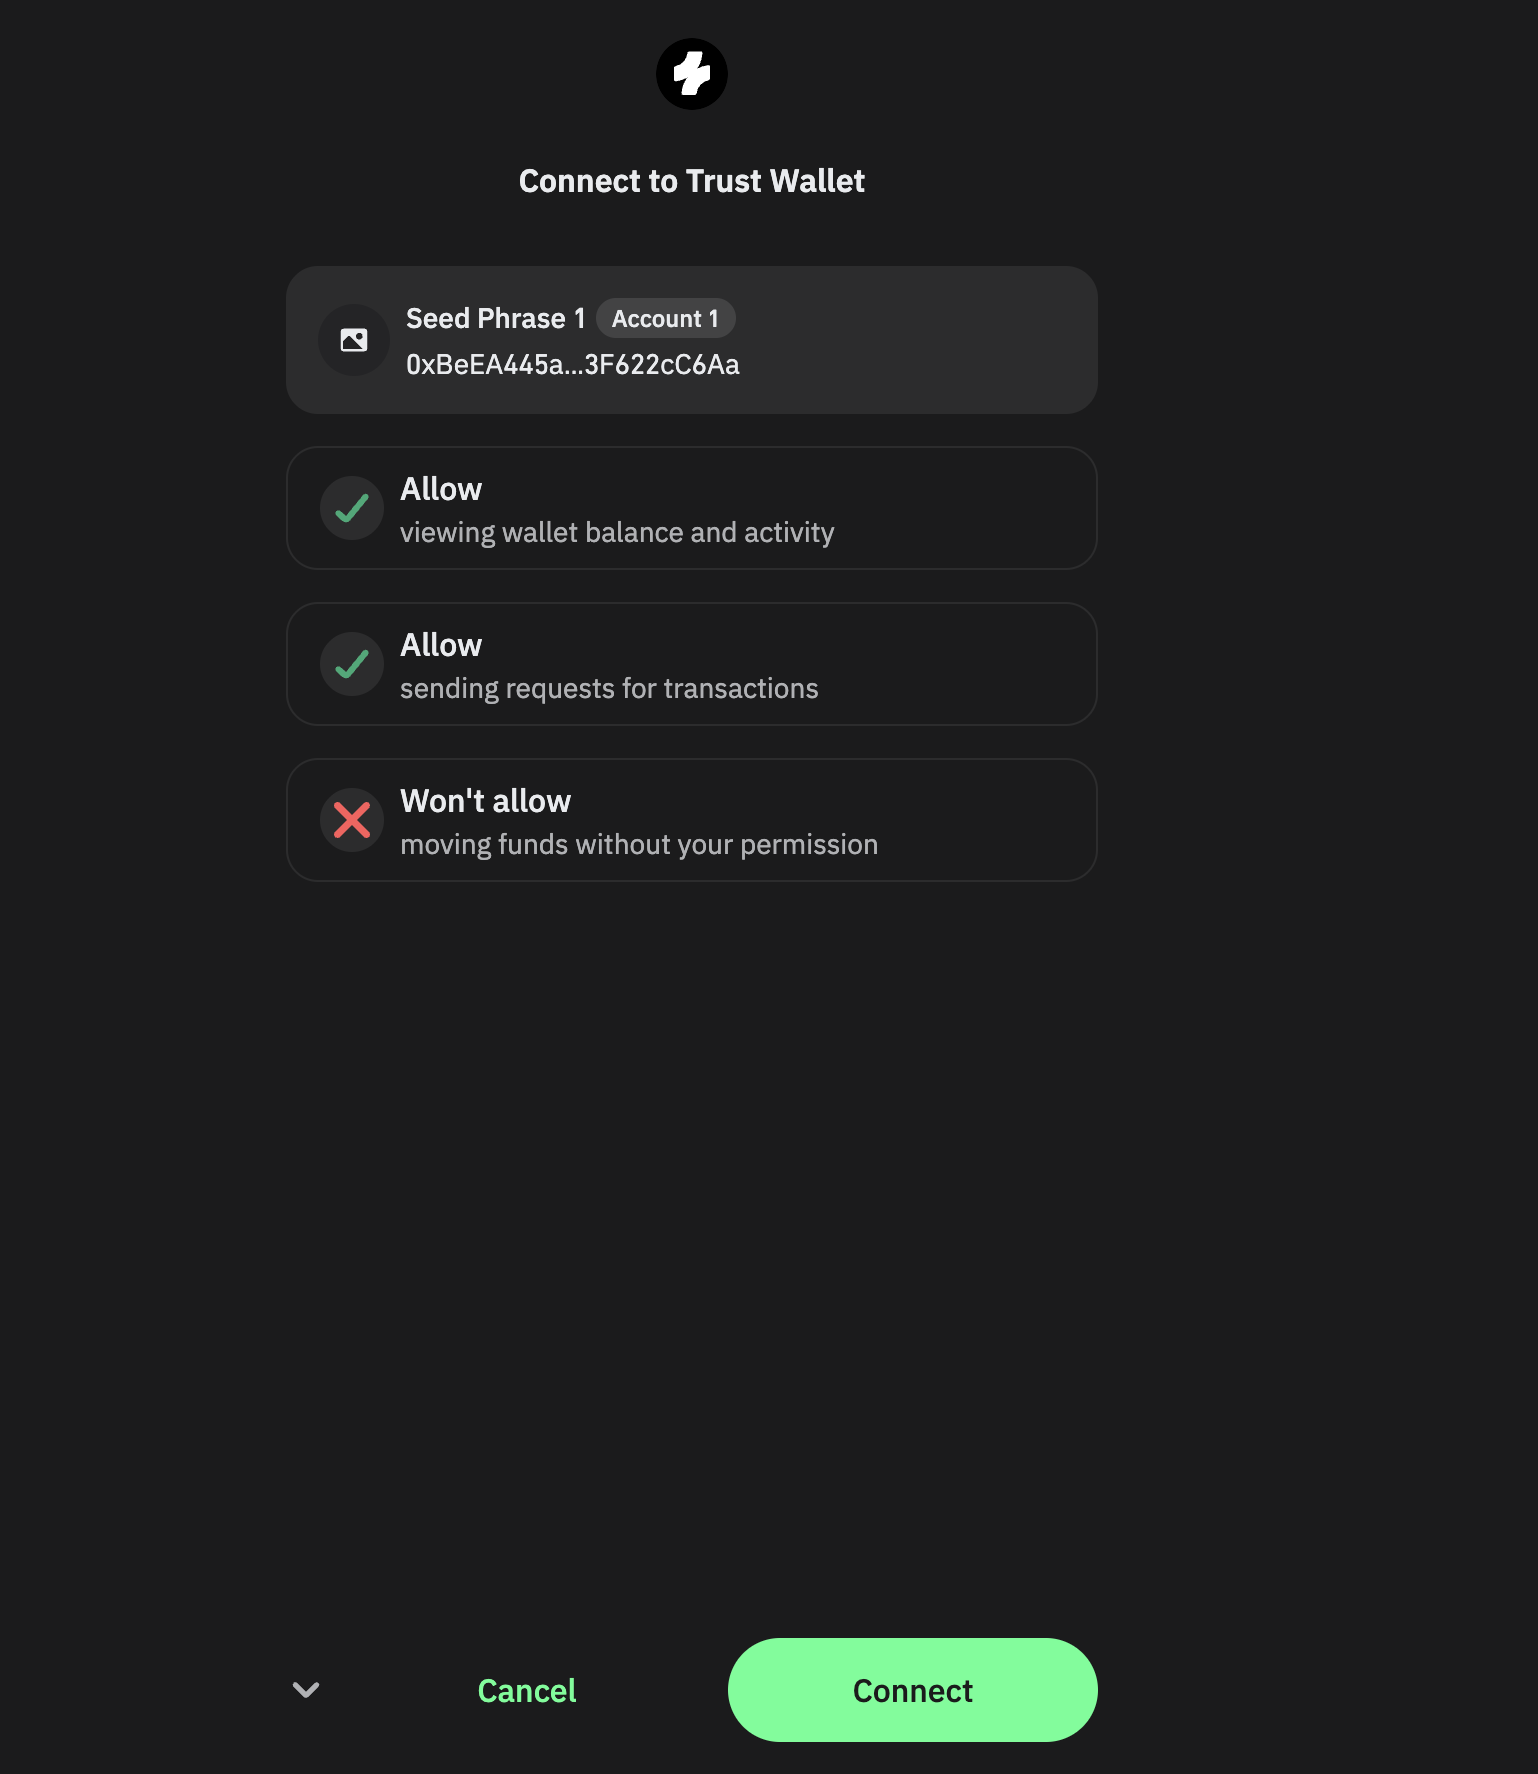
This connection does not authorize any transactions. It’s just a handshake between your wallet and the app.
3. Sign a Verification Message
After connecting, you’ll see a signature request.
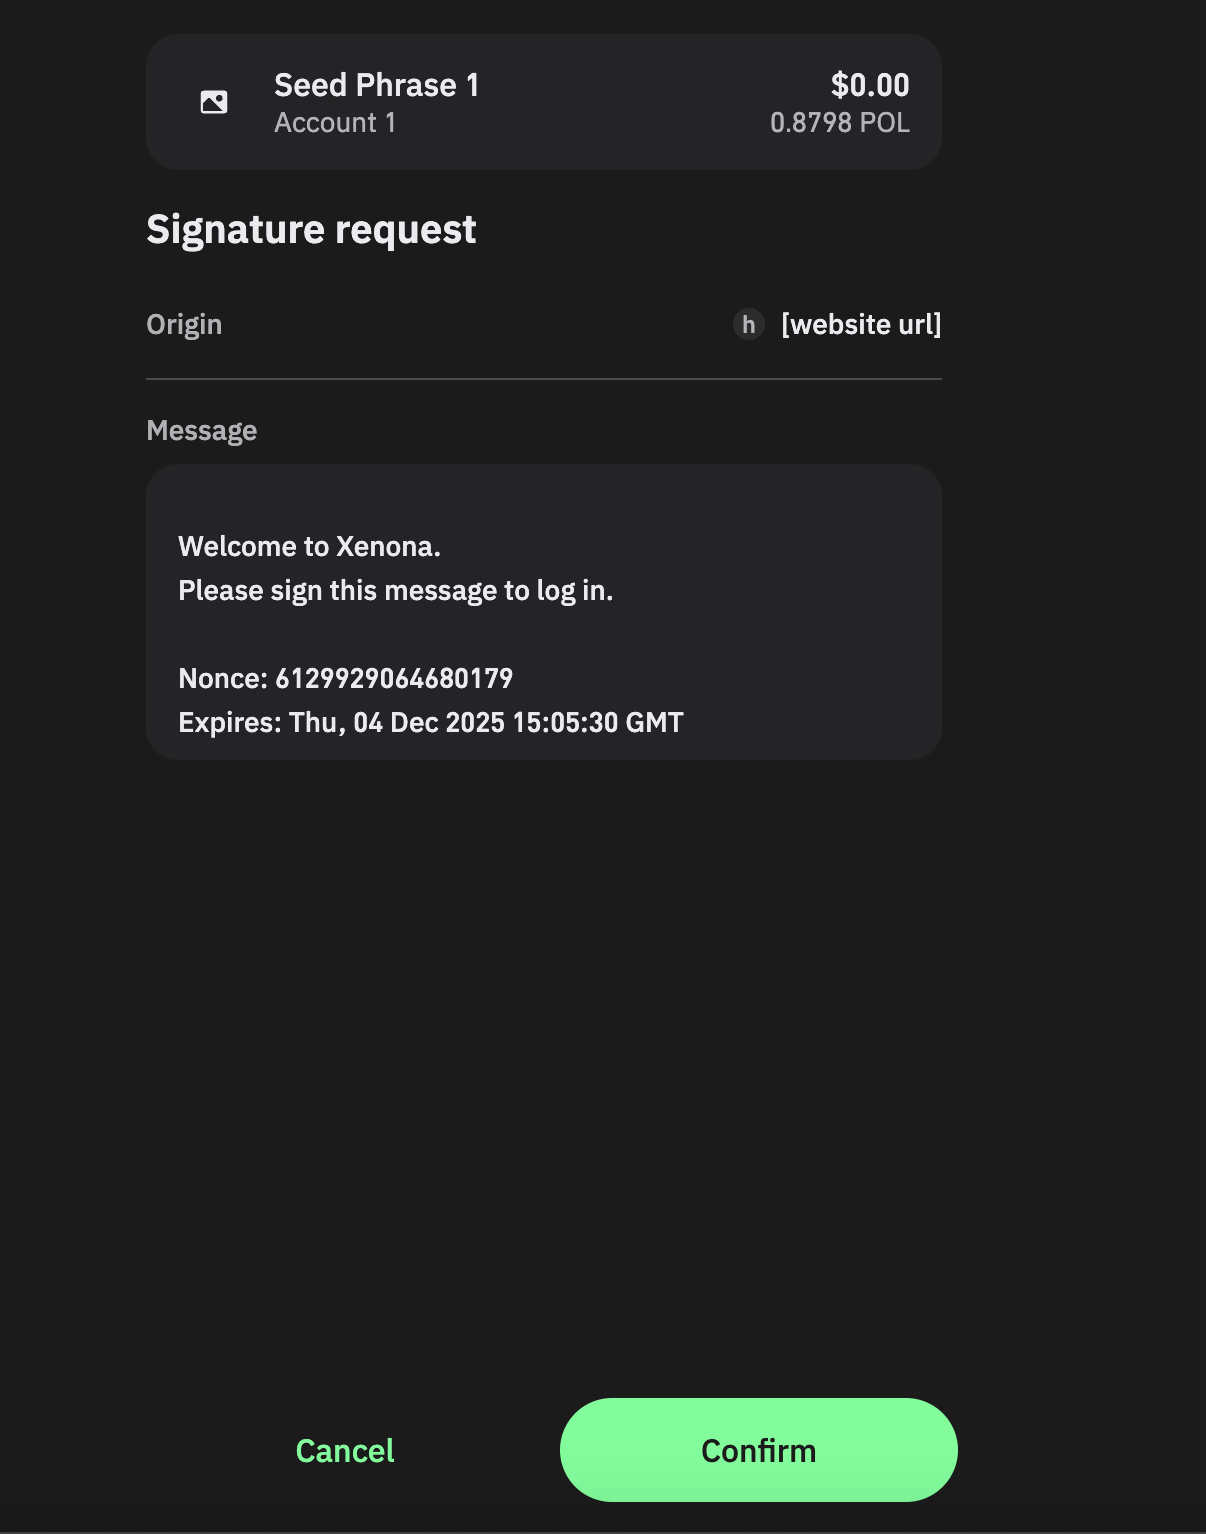
This message is:
- Free (no gas required)
- Non-transactional (does not move tokens)
- A simple proof of ownership
Signing it confirms that you are the real owner of the connected wallet and lets Xenona authenticate your session. This is the Web3 version of “logging in.”
The platform never asks for your seed phrase or private key — only a harmless signature confirming wallet ownership.
4. You're In
Once the signature is confirmed, the Connect button will transform into a display of your wallet address.
That means you’re now authenticated and ready to:
- Create giveaways
- Join giveaways
- Track your entries, giveaways and wins
Your wallet becomes your persistent identity across the platform — simple, secure, and decentralized.